059 :: DIY low power HDD farm
(editting in blogger is really shitty sometimes. are you guys up there hearing me? your editting GUI is shitty)

today is the official start of making the HDD hub (after the unofficial flopped motherboard from ASUS delay of about 10 days).
i just picked up the ASROCK mini ITX board from the forwarder (yes can you imagine Singapore HIGHLY TOUTED as such a savvy country but distributor refuses to import this board for customers? ultimately i blame the trade minister who thinks he has got a fine thing going on in the country, but in reality, increasing business operating costs will one day make even himself beg for food on the streets) ... and so my itchy fingers just have to do something about it :D
Even if you import from NewEGG, they will charge you extra approx USD50 handling. you will need to do this via forwarding services. so what is this bullshit? this TINY little MINI-ITX is suppose to be a cheapie for all kinds of user motherboard, instead, it is kept like 1000year old wine ---> something is wrong with them marketing people. they are dreaming about making that extra 10 bucks to such extreme ends. they should go bury themselves in a hill of TURD.
Even if you import from NewEGG, they will charge you extra approx USD50 handling. you will need to do this via forwarding services. so what is this bullshit? this TINY little MINI-ITX is suppose to be a cheapie for all kinds of user motherboard, instead, it is kept like 1000year old wine ---> something is wrong with them marketing people. they are dreaming about making that extra 10 bucks to such extreme ends. they should go bury themselves in a hill of TURD.

The culprit shown here is a MINI-ITX ... as shown on TV ... ops no sorry NO, NOT ON TV. NOT EVEN at a distributor near you (yes they said it officially that you may not buy it in certain countries, WHY the hell even make this board, make it so hard to GET? WONT THE GUYS at AMD be PISSED at THEM ??
but this board is cool, it is cheap, and it is good for a 15watts CPU.

 there are 3 models, this is the basic model. there is also the passive sinked version, and a WIFI version. i shall show you some SHODDY clipping of the actual specs.
 |
| READ that YELLOW box? |
 i have chosen to house this in an experimental acrylic casing (its a cheapie made in china), it is quite flimsy. but i am trying it out anyway. i have always wanted to have a see thru. but on the otherhand, these boxes are really like what a friend says, a see thru vacuum cleaner. we all know why dont we? the innards are like a dust bag ... after some use
this unit is purchased from NEWEGG (USA). instead of paying for their "premium" CRAPTASTIC USD 50 shipping, i only paid about USD12 using a frieght forward service. TBH they knew our local distributors will not stock this, and the only way is thru them, and while we all know how much it takes for DHL to ship 1 kg ... they have chosen to overcharge any overseas customer. these guys are really at it, taking us for a ride? in fact if you look closely, it only took my forwarder, about USD 7 to ship from USA to Singapore ... duration? about 9 days (it was in fact during chinese LUNAR NEW YEAR holidays !).
thumbs down --> Singapore ASROCK distributor
thumbs down --> ASROCK distribution chain and marketing
thumbs down --> NEWEGG overseas sales channel
in order for shops to crop up more sales, they have deliberately ONLY stock for MINI-ITX boards that are not embedded.
in total i will be jamming into this little guy, about 10HDD which will total hopefully over 20TB ( i have yet to decide on the HDD interface level / raid style / main OS).
 |
| Spotty areas inside the ATX power supply |
 |
| Some little spotty areas at the PWM power section |
 |
 |
| Spotty areas on the HDD control PCB |
 |
| more DIY server fun, choosing how to do your .... OS |
LINUX is unlike Windows, somewhat similar to IOS. but in both windows and IOS, you do not have to choose (http://distrowatch.com/) ... look at the number of flavors ! so many ... so yummy ...
so since this is a server, we need to download ubuntu server ISO (about 550mb). burn that to a trusty CD. pop it in and let it roll or spin. during the install, plugin the RJ45 to allow the OS to "see" and setup DNS. after this initial install, do the SUDO update + upgrade (which will take a few hours, you have to plugin to the internet for this), THEN install XUBUNTU desktop. THEN reboot, AND re-update desktop... WALA !
when in doubt, this is the awesome video channel to get some help
https://www.youtube.com/user/babarehner/videos
when in doubt, this is the awesome video channel to get some help
https://www.youtube.com/user/babarehner/videos
more thermal tests. today i gave the HDD and motherboard a skin of black to dissipate more heat and enable the thermocam to sense heat @ a more normalized emmissitivity ratio
 |
| same OS drive start up |
 |
| motherboard PWM converter |
 |
| Rear of motherboard (obscured by acrylic) |
 |
| The 4TB drive (without matte painting) |
 |
| Kubuntu sports it own HDD drive test |
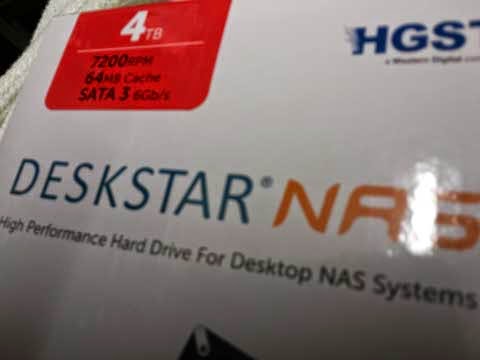 |
| the new Hitachi NAS drive |
 |
| the
ASSROCK motherboard. normal acrylic spray paint black matte. i may have sprayed on too much paint in an attempt to soak it all the way into the crevices trying to bond more component to disspation surfaces and increase thermal dissipation. |
 | |
| rear side. again too much paint. ops |
 |
| the OS HDD. an old WD 640Gb. a very very angry and hot HDD. same theory |
  |
| it appears to be the SOT223 next to the USB3 connector! i know what to do to this hot little prick! solder on a small brass tab, that will increase thermal dissipation by about 2watts ! which will in theory lower the operating temperature by about 5 to 10degrees. |
 and here are 3 HDD, sitting around about 5 minutes idle. leftmost 640Gb WD, 4Tb HGST, and flat down 4TB HGST. it is amazing to see that with a special SILPAD along the base of the leftmost 2 HDD just only sitting on a heatsink, it is already having a cooler day.
note the sink below, the black matte portions are signifying alot of heat dissipated from underside, which means the sinks are really sucking off heat from the HDD on top.

and this is the famous rocketRAID 2680 which everyone is cursing and swearing at about their blotchy drivers in LINUX. its red hot hot hot ! EVEN after black matte spray treatment. how can they design a RAID controller with such an operating temperature??
 |
| power off after 20minutes. very easy to spot that the idle piece of heatsink is really spitting heat energy it sucked from the HDD ... so hard that ... the guy on the right is still RED with ENVY ! |


**Update. i have finalized the HDD farm internal framework and will be starting to build the HDD frame shortly this month when the materials arrive.
today i did some additional mods to the spots of heat on the motherboard

originally i only added this brass tab to the hot SOT223. by simple estimation, if the SOT223 have a Tja = approx 80°C, we can approximate that @ 1watt dissipation, the junction is burning at an easy 110°C (ambient of 30°C) inside. for most small package SMD devices, it is common to see Tja characteristics of around 60-100°C/watt.
 |
here we see the thermogram of the bare stock board, the SOT223 is screaming at 61°C, which could give us a guess that the die is operating at possibly 141°C( silicon die peak operating are normally rated at around 150°C )


and WALA ! the peak temp of the ALU piece is now at about 45°C (doesnt register as a white irritating hot spot anymore !)
the sink was stuck onto the brass tab with a special high temp silicone (silcoset)
from 61°C to 45°C stable! add in the Tja characteristics, we can now assume that the Tj of the die inside could be floating at 125°.


Comments
Post a Comment
feel free to ask me anything